
Diese Anleitung gibt es hier auch in deutscher Sprache ![]()
First of all I want to clarify: Neither the technique nor the pendant are my inventions. The technique is known since several hundreds of years. The first time I saw such a pendant made by „Didi“, was in the internet platform „drechseln-und-mehr-forum “ in April 2005.
I attempted to develop simple and safe methods of mounting the work piece, to make the turning of a pendant as smooth as possible and to keep the loss of wood and wear of tools at minimum level.
The wooden blank
Of course you may use any kind of wood which is suitable for turning, however the choice of the proper wood will tremendously reduce the cleaning job of the lattice.
Short grained and burled woods are ideal.
I made good experiences with plum, pear, apple, olive, boxwood, cocobolo, rosewood, lilac, African blackwood, Finnish silver birch, and tulipwood. However my favorite is brown mallee, which almost does not require any final cleaning work of the lattice.
Note: This is not a complete list of recommended woods.
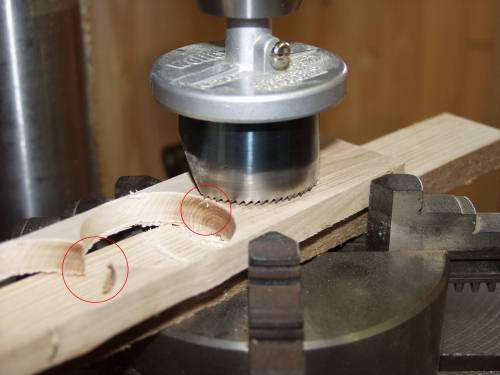
You may round the blanks by turning them between centers. However I use a holesaw of which I cut off the drill bit. I insert the saw blade with the desired diameter. I then mount a 2″ wide slat, about 3/8″ to ½“ thick, on the vise of a pillar drill and cut out the blanks.
It is of importance to position the saw in a way, that at least one point of the outer rim of the saw blade is cutting in open space. The blank still will be round, but with each revolution the saw dust is removed, the saw blade will not get as hot and it will produce a clean cut blank.
Mounting the blank
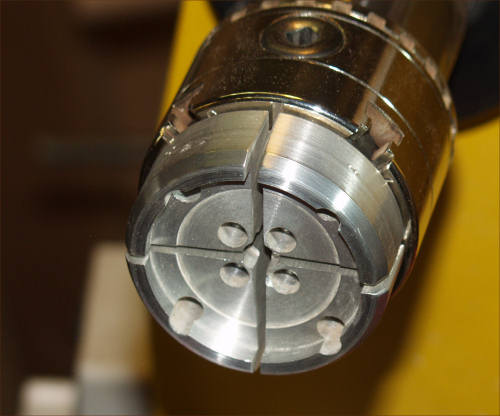
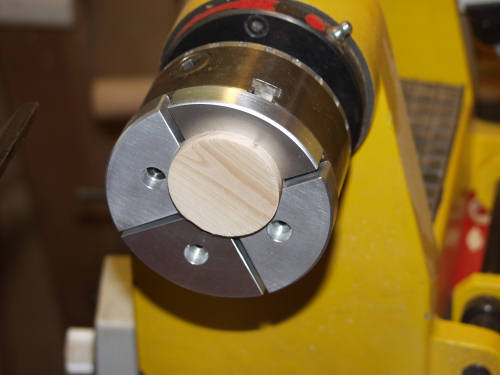
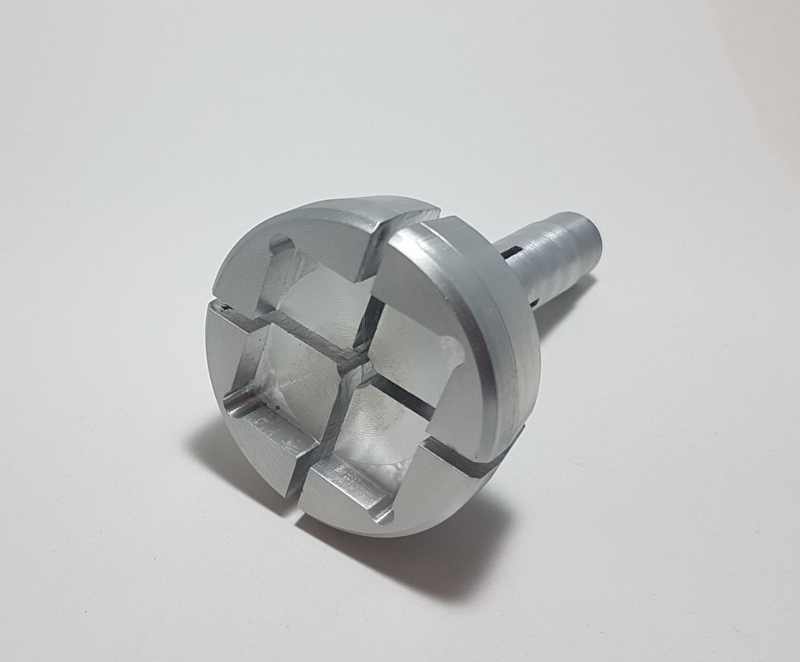
There are numerous ways to mount the blank, e.g. mount it with hot glue on a piece of scrap wood or make a wooden chuck. These methods are lavish and time intensive. Besides that, with these methods I destroyed numerous blanks and some self-made turning tools. To simplify the process, I designed three sets of chuck jaws, made from aluminum.

The first set of jaws will hold a blank 1-7/8″ in diameter, 1/6 “ thick, and about 5/8″ off center. This set will be used to turn the eccentric spheres.
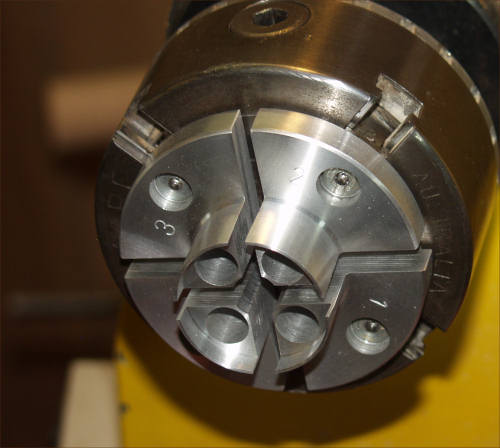
The second set of jaws will mount the blank concentric. The picture shows a set made for the Mini Chuck by Jet.
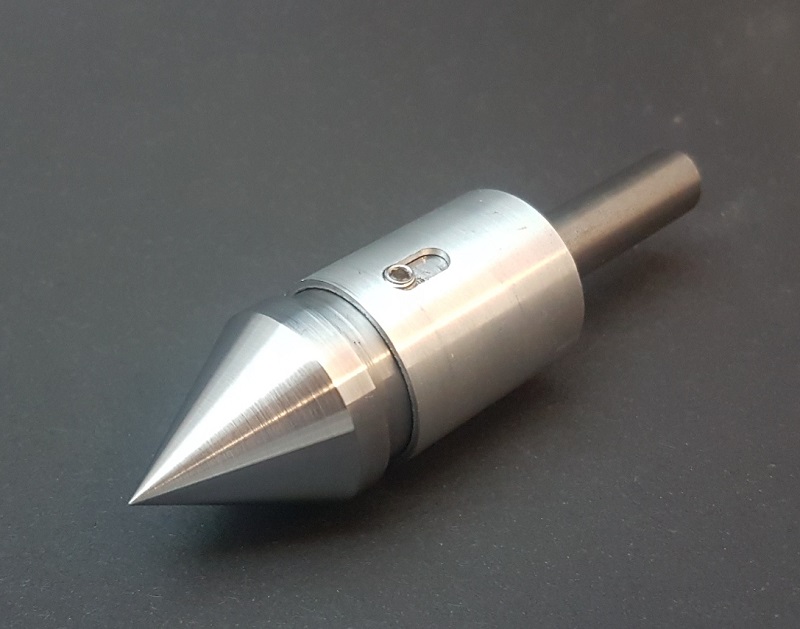
The „groove jaws“ will grip on the concentric grooves on the back side of the pendant, in such a way that the work piece can be turned from the front and on the edge.
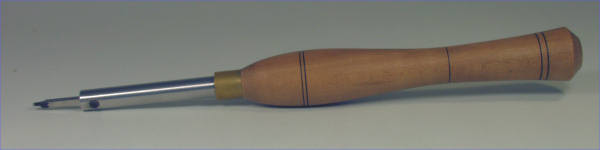
The turning tool
This is my universal tool for all lattice work. I made it out of a steel bar with handle, in which I inserted a 1/8″ HSS square, secured with a crub screw. The tip is ground down to a width of approximately 1/16″ and furnished with a cutting edge.
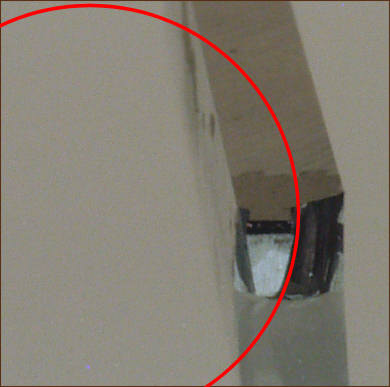
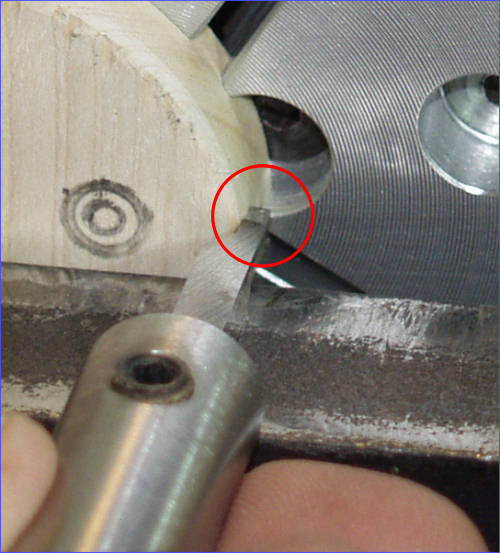
It is of importance that the profile of the tool is shaped in a way, that it fits into the spheres to be turned, which means that the lower edge needs to be shaped conic or round. The red circle in the image symbolizes a sphere to be turned. Of course the benchmark for the edge is the diameter of the smallest sphere.
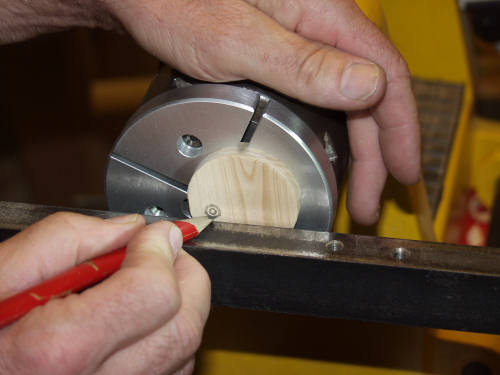
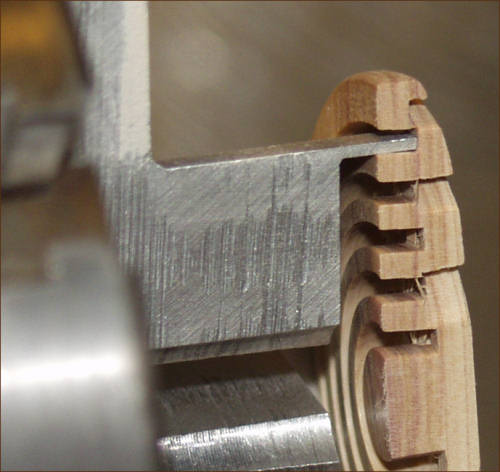
The tool rest
I use a flat tool rest which is made out of a steel square. Certainly, any other tool rest will do, but mine has two significant advantages: The tool rest can be positioned very close to the blank, so there is minimum overhang of the tool.
If you have too much overhang, the 1/8″ square chisel will start vibrating, which is the first indication for a destroyed pedant or turning tool. Since it is impossible to preclude that pedant or tool will burst, safety goggles are a must. Also the tool rest serves as stopper for the tool, guaranteeing an equal depth of the grooves on the eccentric side.
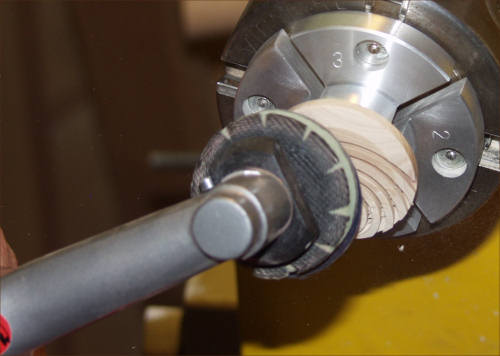
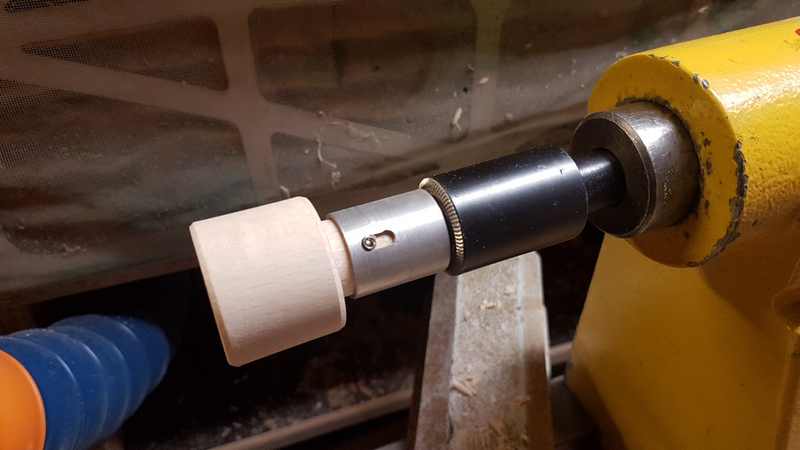
Turning the face of the pendant
Mount the blank with the eccentric jaws. Make sure that the blank is cross-grained.
Mark the inner sphere with a pencil.
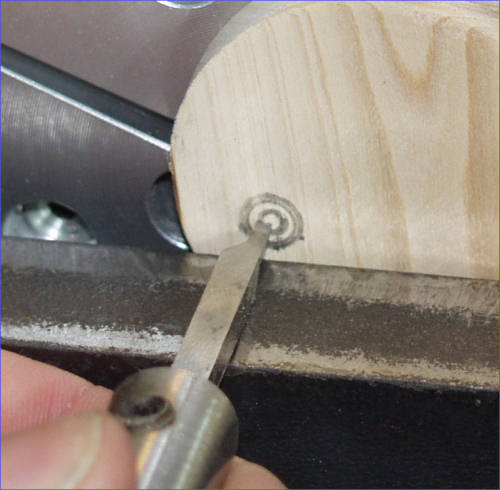
Now adjust the tool rest exactly to center heights.
When using the tool rest as stopper, let the tip of the tool stick out exactly that long, that the hang-over will cut 1/8″ in depth grooves.
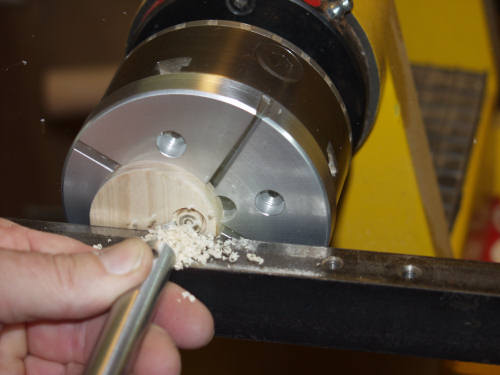
Now finally, start turning the grooves. Slightly press your left hand against the tool rest to ensure uniform grooves.
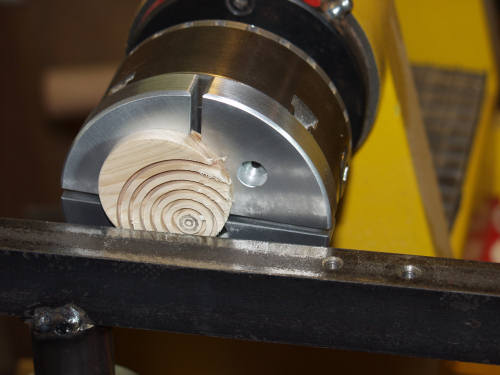
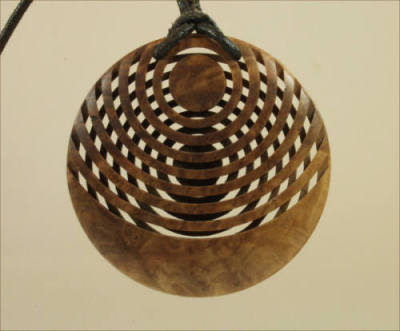
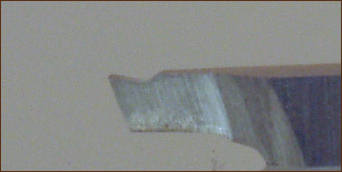
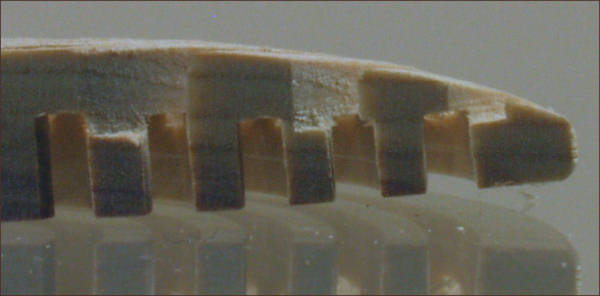
The images shows the finished face of the pedant
The frayed fibers on the edge of the grooves indicate, if the wood is suitable for this kind of work and/or if the tool was properly cutting. I recommend to sharpen the tool prior cutting the grooves. This will significantly reduce the final cleaning job.
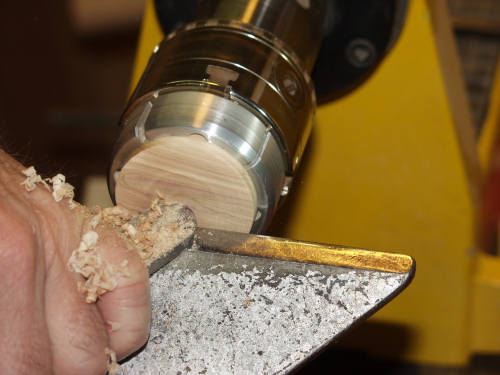
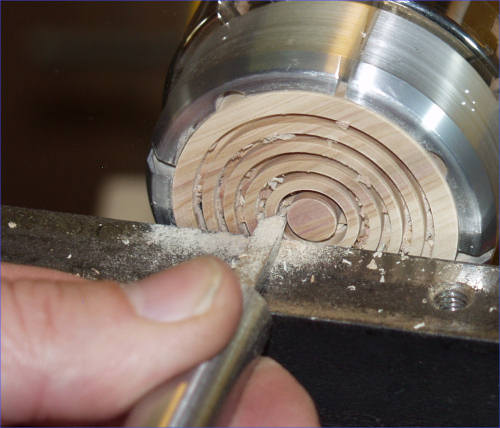
Turning of the back side.
Mount the pendant concentric and turn to a slightly convex shape with approximately 3/16″ to ¼“ thickness.
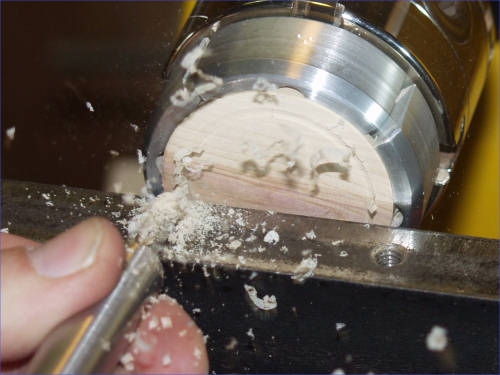
Start from the outside when cutting the concentric grooves, again use the square tool rest.
The profile of this pedant shows that is important to cut the most outer sphere at minimum depth (see right bottom on the image). Since the front is rounded, this is the thinnest part of the pedant. If cutting too deep, the pedant will be destroyed during the sanding job.
For the other grooves you have more tolerance. For the rest of the grooves it is not necessary to work as precisely as you do for the first one.
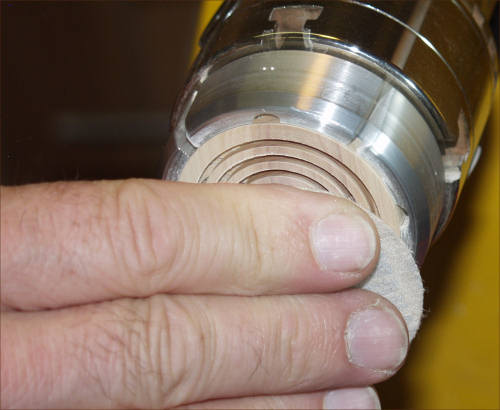
Now finish the back side.
Clear the inside of the grooves with a folded piece of sandpaper.
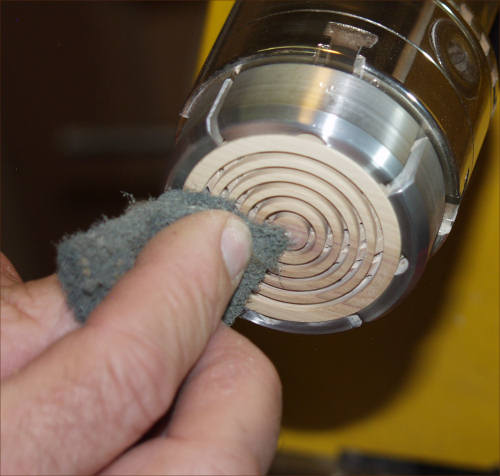
Final sand and rounding the edges with a scouring pad.
The face again
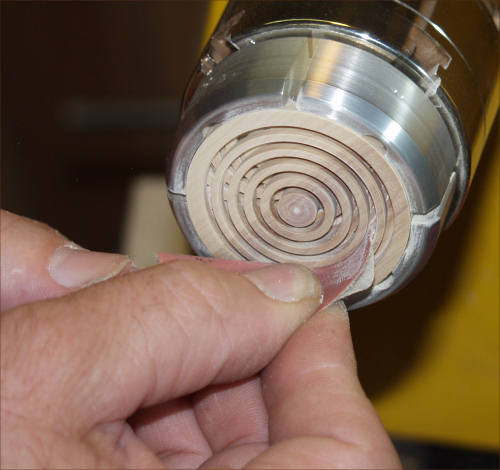
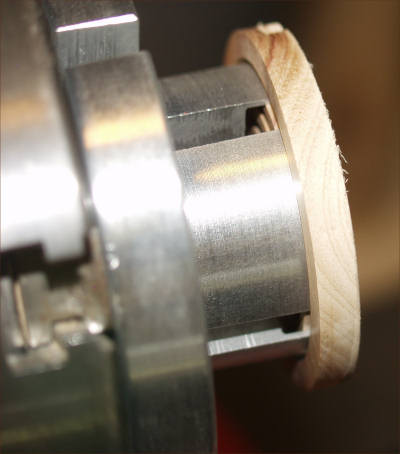
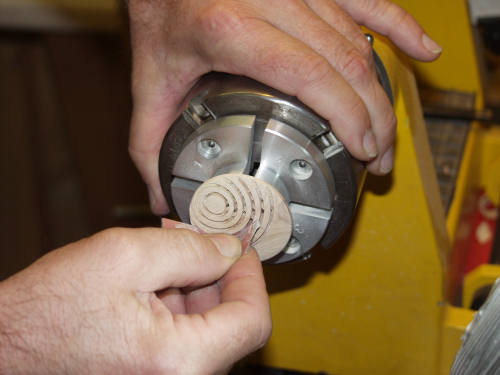
Now mount the blank with the groove jaws, but use sense and be very careful.
Never spread the jaws, because due to the clearance of the chuck more pressure will develop on the outside with increasing speed, which definitely will destroy the extremely fragile pedant.
This profile shows the proper way of mounting. The jaws have a full grip on the groove.
Bring the face to a convex shape by using 120 grit sand paper. You could turn the face, but pending on the kind of wood, in this state the outer edges of the grooves may burst off.
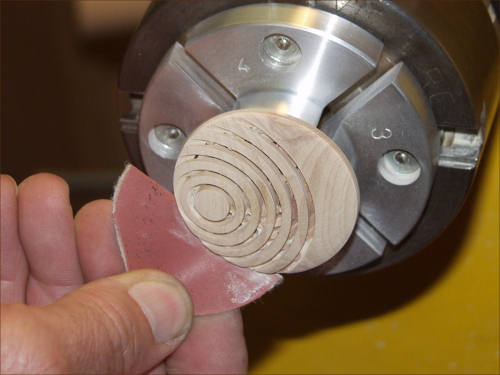
Finish the face and the outer edges by hand with a fine coarse sand paper.
Final sand the grooves and its edges with the lathe turned off.
Cleaning and coating
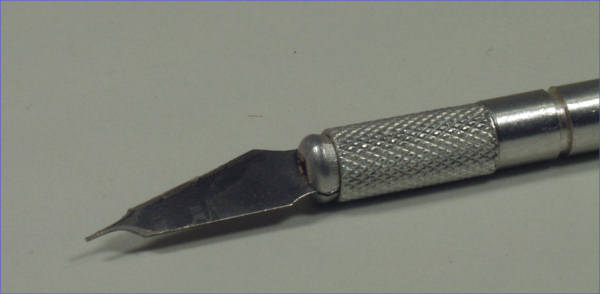
Pending on the kind of wood and/or the sharpness of your tools, fibers still might be inside the groove, which needs to be removed. For this purpose I use a especially shaped carving knife. When this is done I finish the pendant with a layer of tung oil.
Suspension
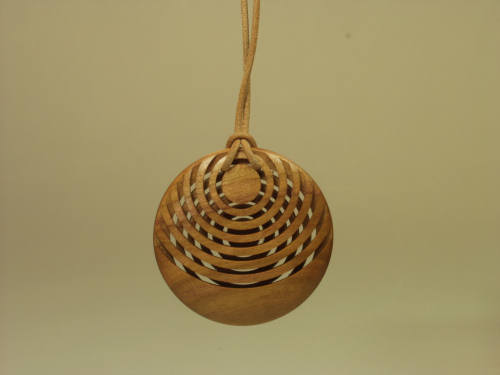
To suspend the pendant I usually use a thin black or natural-in-color leather lace. Since you put in a lot of effort in turning the pendant, you should rather spend a few cents more and get a pretty ductile lace, which is straightened by the weight of the pendant.
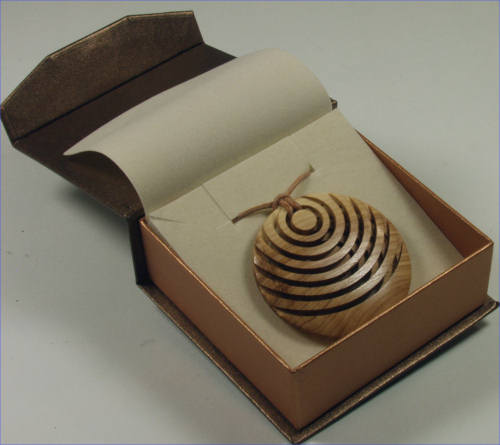
Placed in a suitable box it will make a perfect gift.
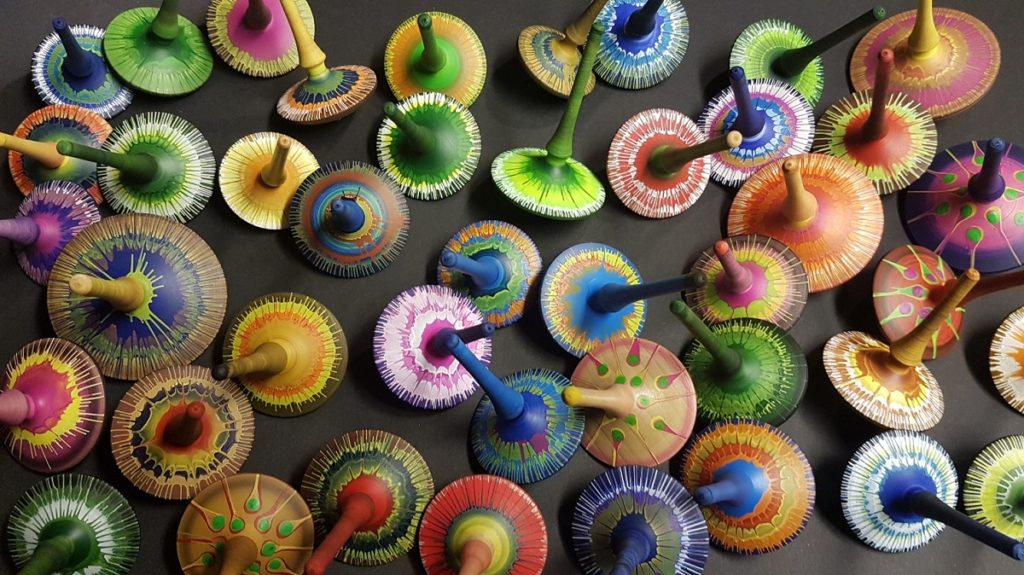
Variations
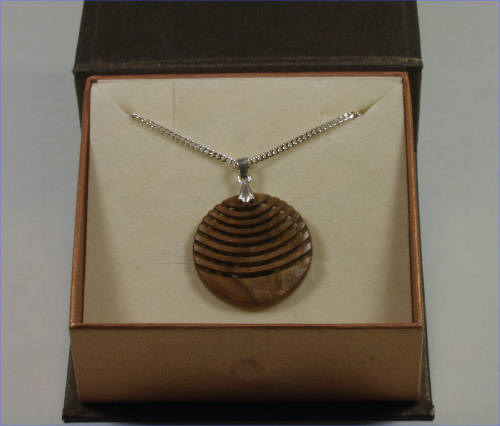
Of course you may make the pendant smaller and suspend it on a silver lace. In the above image the center has been moved.
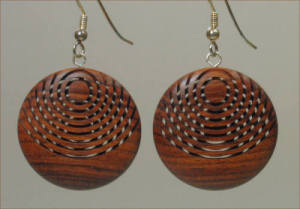
Ear rings made from violet wood and lilac, diameter 1 1/8″.

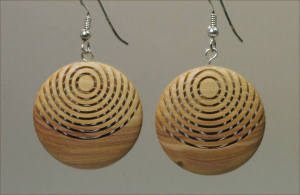
This pendant was turned with the same jaws. You will find detailed instructions how to make it in the 2009 summer issue of the „Drechslermagazin“
Do you sell your chuck’s ?
Very well done instructions !
Danke für die Mühe!!!!